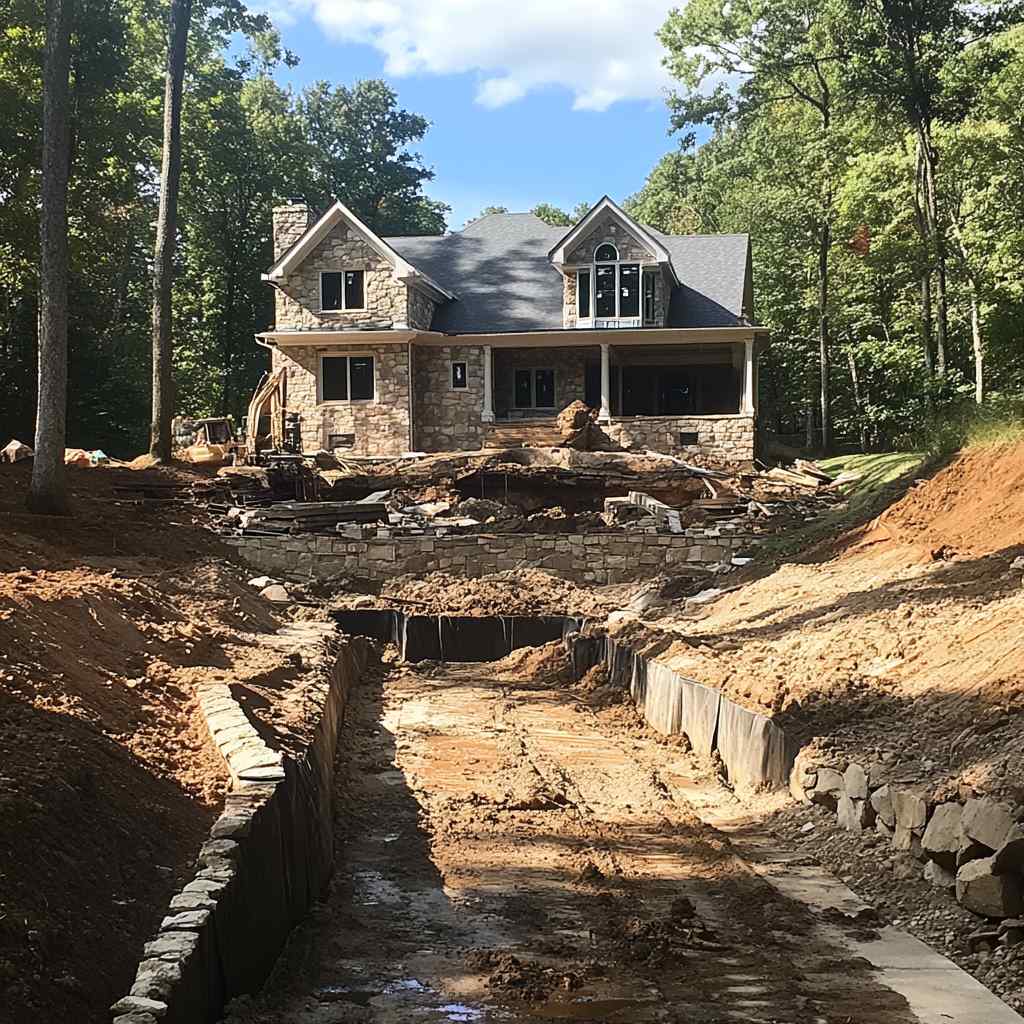
Indepth Excavation knows that excavating a hill for retaining walls requires skill and planning to ensure a solid and long-lasting structure. It is important to start with a wide, deep, and level trench that can accommodate the blocks and provide enough space for proper drainage. The trench should be compacted to prevent settling and the base should be made of crushed stone for better drainage. Getting the first course right is crucial, as it sets the foundation for the rest of the wall. Sweep before stacking to avoid misalignment and maintain a level height. If the wall runs up a hill, continue the base course into the hill and save money by using cheaper blocks for the bottom course.
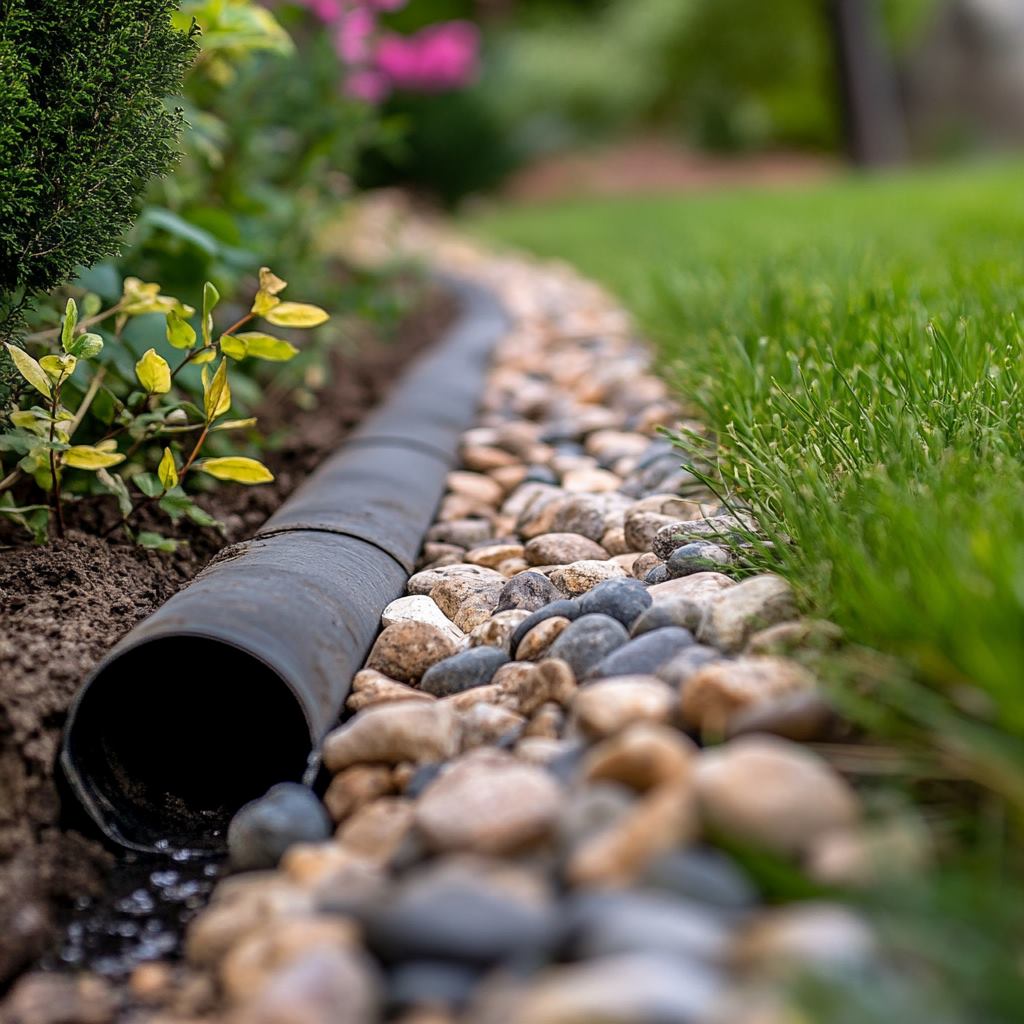
Proper drainage is essential for retaining walls, and a drain tile should be installed on top of the backfilled wall and connected to a drain grate. It is important to use the right type of retaining wall blocks, such as Versa-Lok, and to consider splitting blocks for a rough finish or using a saw for smooth cuts. Staggering joints and keeping them tight is necessary to prevent water and sediment from seeping through gaps. Backfilling with stone and properly aligning the capstones completes the construction process. For taller walls, engineering may be required, and it is important to consult with professionals when necessary.
Understanding the Importance of Retaining Walls
Retaining walls do more than hold soil; they control erosion, manage water runoff, and turn steep slopes into usable space. In areas with hilly terrain, these walls are essential for preventing soil movement and improving property functionality. Factors like proper drainage, soil pressure, and material strength all play a role in wall stability. Poor design or lack of drainage can cause walls to fail prematurely.
“Retaining walls are carefully engineered systems that play a crucial role in preventing soil erosion, managing water runoff, and creating usable yard space.”
- Retaining walls are essential for controlling sloping lots and managing soil erosion in hilly terrains.
- Proper design, drainage, and material selection are crucial for the stability and functionality of retaining walls.
- Taller retaining walls require professional design and installation, and may involve step-terracing techniques.
- Materials such as concrete, timber, interlocking blocks, stacked stone, brick, or cinder block can be used for retaining wall construction.
Retaining walls are not just structural elements; they can also enhance the aesthetic appeal of your landscape. By understanding the importance of retaining walls and considering the specific needs of your project, you can create a beautiful and functional outdoor space that withstands the test of time.

Selecting the Right Material for Your Retaining Wall
- Block Systems: Popular for their strength and easy installation, brands like Versa-Lok and Keystone offer flexible designs.
- Concrete Walls: Extremely durable, ideal for large walls, and can be faced with stone veneer for added beauty.
- Timber Walls: A budget-friendly option for walls up to 4 feet, offering a natural look but needing proper treatment to resist decay.
- Brick and Stone: Great for aesthetics but require solid planning for taller walls due to weight.
Block Systems
Block systems made of cement and lightweight aggregate materials are a popular choice for retaining walls. These systems offer easy installation features, as they come in various designs and can be easily assembled. Block systems, such as the Keystone, Risi, Rockwood, Tensar, and Versa-Lok, provide versatility and strength while allowing for creative design options.
Concrete Retaining Walls
Concrete retaining walls are known for their strength and durability when properly designed and installed. They offer a range of design options and can be veneered with masonry for a more attractive appearance. Concrete walls are a great choice for larger retaining wall projects and can withstand heavy loads.
Timber Walls
Timber walls are a moderately challenging option to build, but they can be cost-effective for walls up to 4 feet high. They provide a natural aesthetic and are often used in more rustic or organic landscape designs. Timber walls require proper treatment to resist decay and ensure longevity.
Brick and Cinder Block
For a more traditional or formal look, stacked stone, brick, and cinder block retaining walls can be a great choice. These materials offer a range of design options and can create a visually appealing structure. It’s important to consider the weight and stability of these materials when building taller walls.
When selecting the material for your retaining wall, consider factors such as cost, installation requirements, and design compatibility. Consulting with professionals and considering the specific needs of your project will help ensure that you choose the right material for a successful and long-lasting retaining wall.

Step-by-Step Guide to Excavating a Hill for Retaining Walls
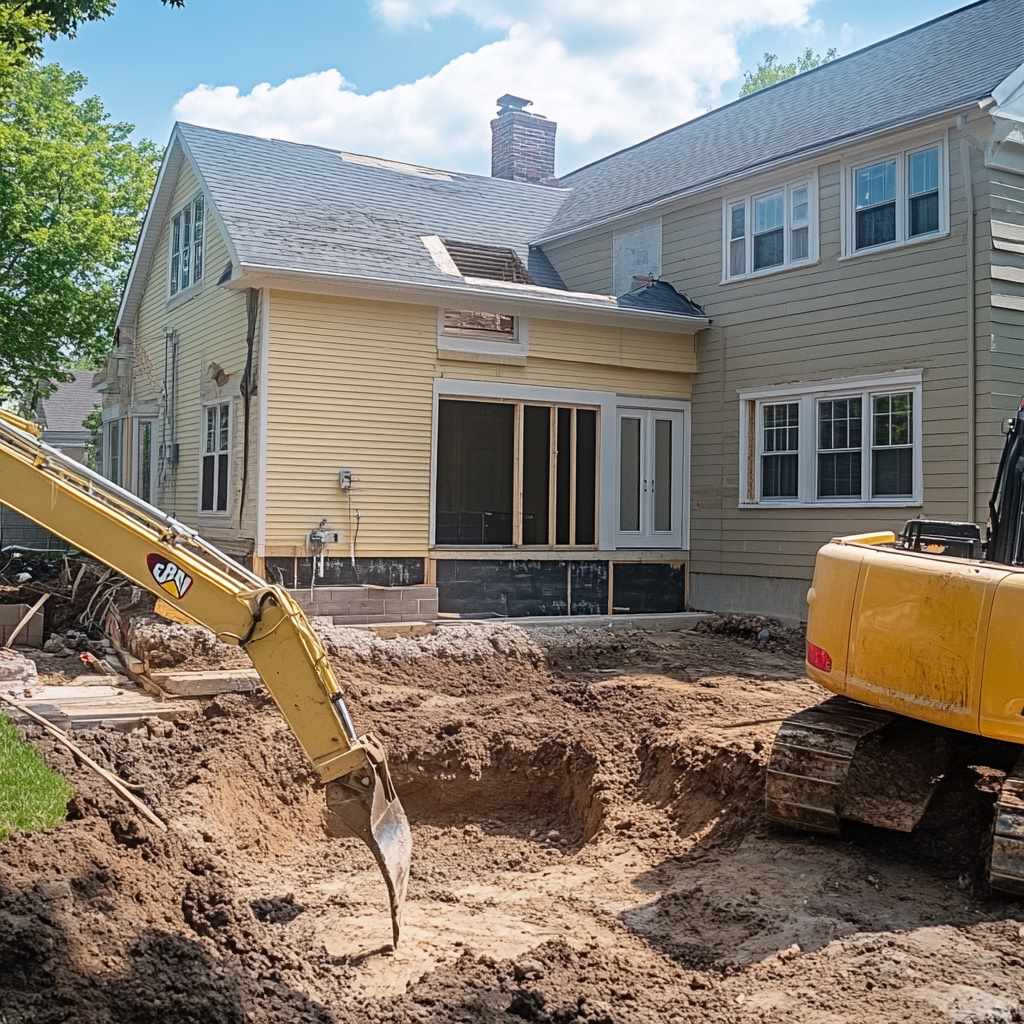
Site Assessment: Start by evaluating the hillside’s slope, soil type, stability, and drainage patterns. Take note of any potential hazards like tree roots, buried utilities, or loose soil.
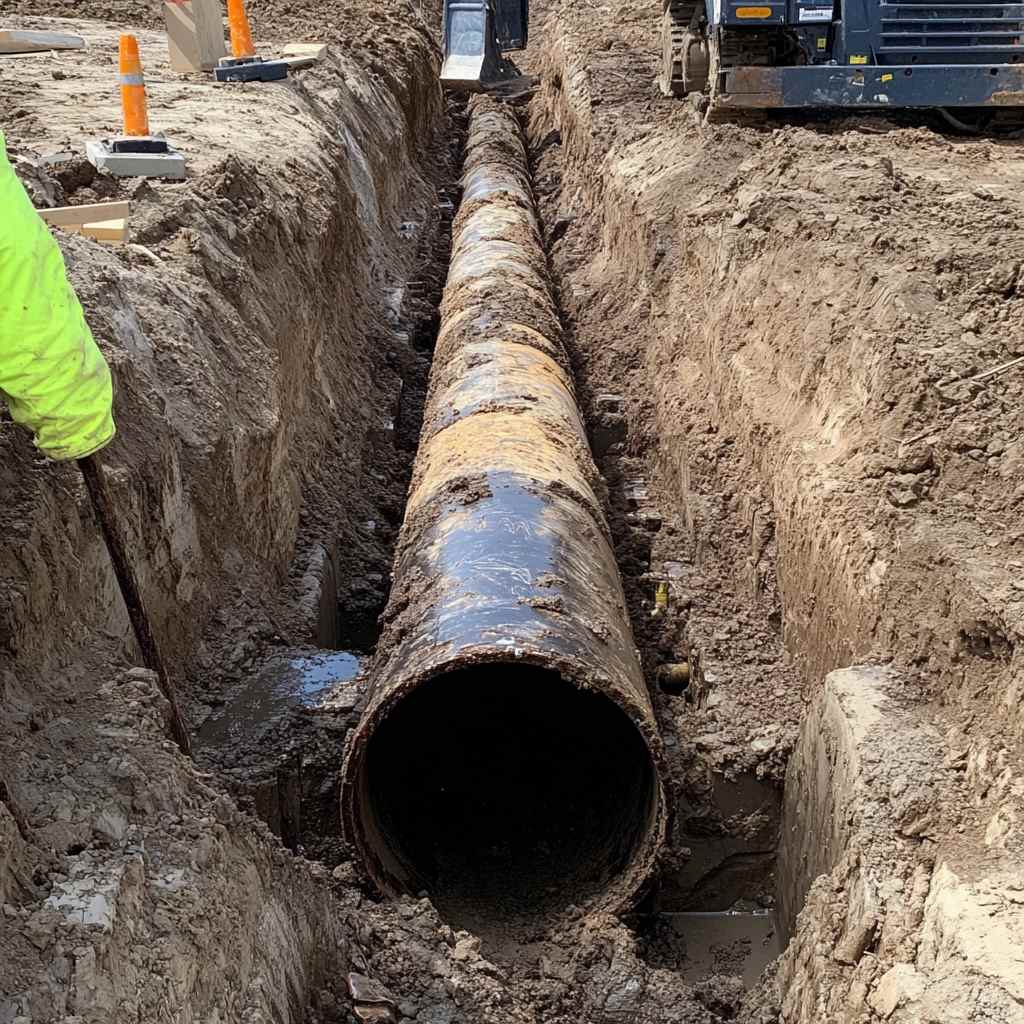
Planning and Marking: Use stakes and string lines to mark out the trench dimensions, ensuring it’s wide and deep enough for both the blocks and the drainage system. Double-check measurements for accuracy.
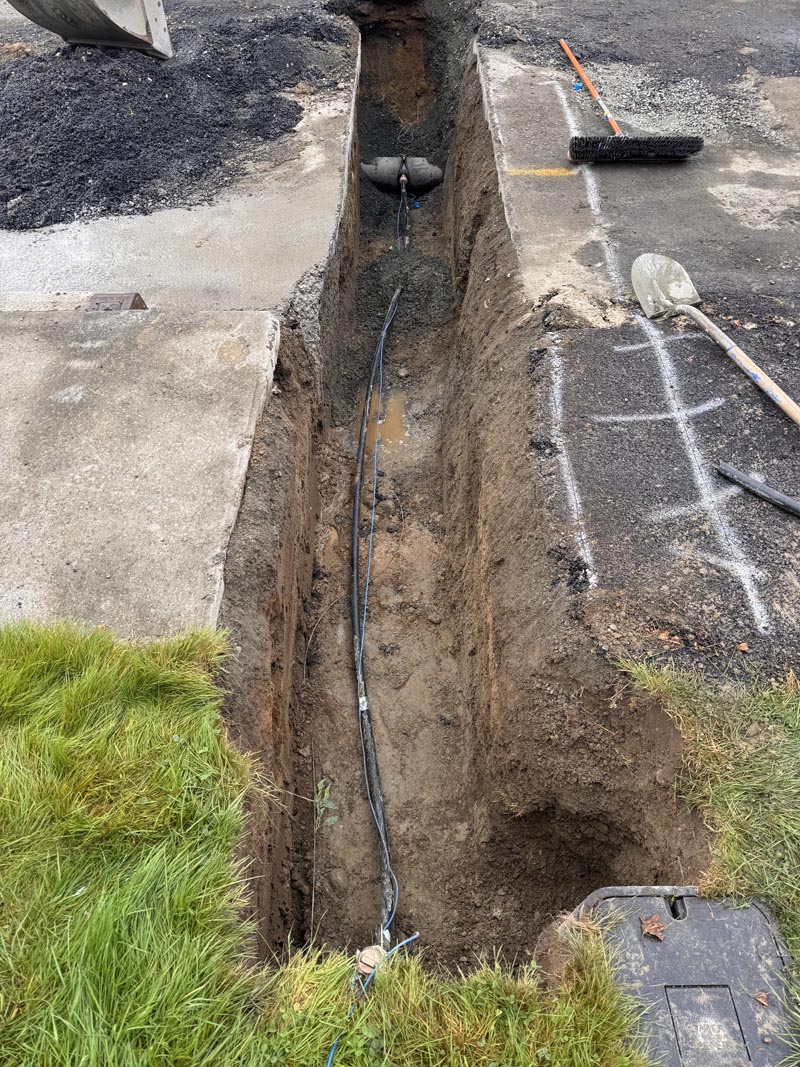
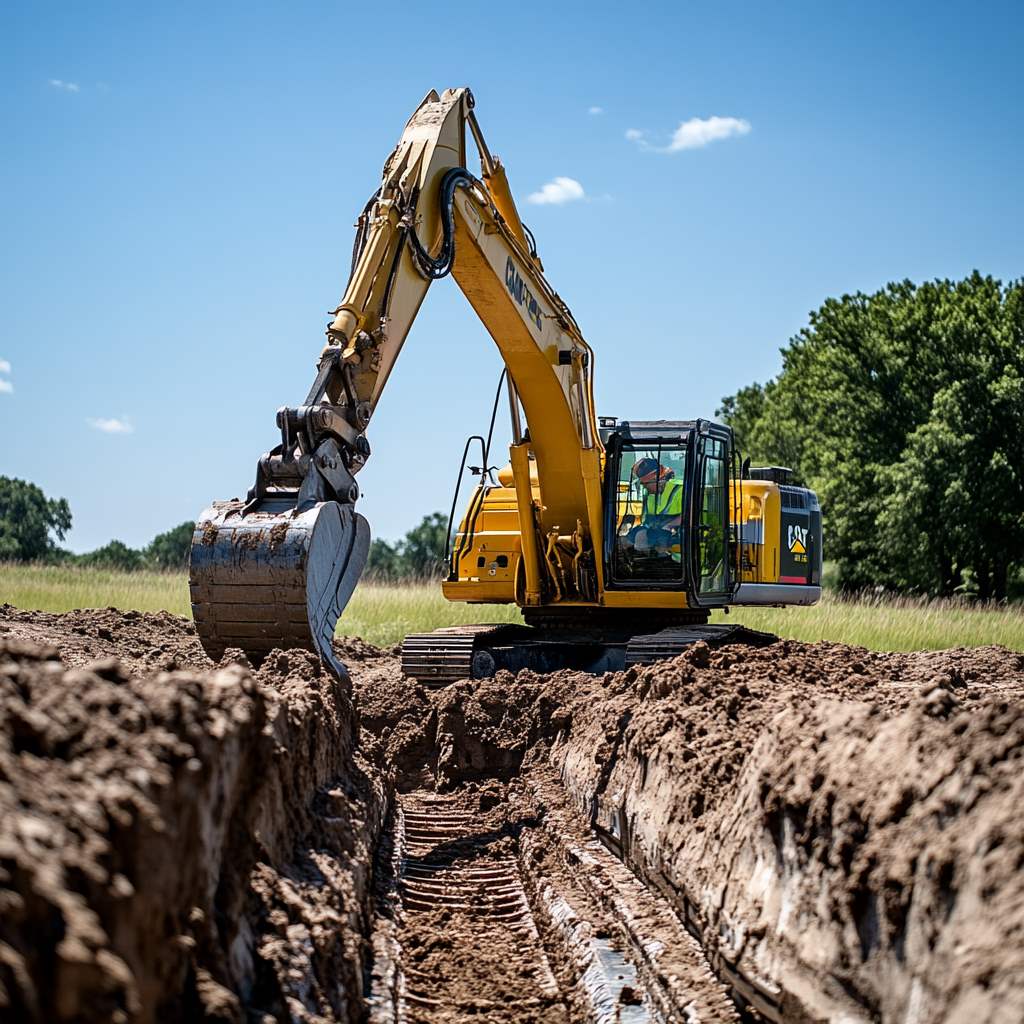
Excavation: Begin digging with appropriate machinery such as an excavator or mini backhoe, removing soil down to the required depth. For tricky spots, hand tools may be needed for precision.
Compacting the Trench: Once excavated, use a plate compactor to compress the soil at the trench bottom to minimize settling. This step is vital for long-term stability.
Setting the Base: Add a layer of crushed stone (typically 6 inches or more) across the trench floor. Spread it evenly and compact thoroughly to create a firm, level base that promotes drainage.
Leveling and Building: Set the first row of blocks carefully, using a level to make sure each block is aligned. This base course will determine the strength and straightness of the entire wall. As you build up, remember to backfill with drainage gravel behind each course for stability and water management.ing with complex terrain, it is advisable to seek professional assistance. By following these steps, you can ensure a successful excavation and create a sturdy retaining wall that effectively retains the hillside.

Maintaining Stability during Excavation
During the excavation process, it is crucial to maintain stability to prevent accidents and ensure the wall’s longevity. If the hillside soil is loose or unstable, consider using retaining wall reinforcement techniques, such as geogrids or soil nails, to provide additional support and prevent soil erosion.
Consulting with an engineer or retaining wall specialist can help you determine the appropriate reinforcement methods for your specific project.
Tips for Successful Retaining Wall Installation
Installing a retaining wall requires careful planning and attention to detail. Here are some essential tips to ensure a successful installation:
- Select the right materials: Choose a material that suits your specific project requirements and design preferences. Consider factors such as durability, cost, and aesthetics.
- Prepare the site: Clear the area of any vegetation or debris. Ensure the base is level and free from any obstructions that may hinder the installation process.
- Proper drainage: Adequate drainage is crucial for the longevity of your retaining wall. Incorporate drainage pipes or weep holes to prevent water buildup behind the wall.
- Use proper backfill: Fill the space behind the wall with granular material for optimal drainage. Compact the backfill to prevent settling and ensure stability.
- Pay attention to alignment: Accurate alignment is essential for a visually pleasing and structurally sound retaining wall. Use a string line or level to maintain a straight and level wall.
- Secure the capstones: The capstones are the finishing touch to your retaining wall. Apply a suitable adhesive to secure them in place and prevent shifting or instability.
Following these tips will help you achieve a successful retaining wall installation. However, it is important to consult with professionals or experienced installers for complex projects or taller walls that require engineering consideration.

With the right approach, materials, and attention to detail, you can successfully excavate a hill and build a retaining wall that’s both functional and attractive. Whether you’re handling a small DIY project or working with a contractor, preparation and planning are key to lasting results. For larger or more complex retaining wall projects, it’s a smart move to bring in professionals who have the tools and expertise to handle every detail.
In-Depth Excavation offers experienced crews and reliable service to help you tackle any hill excavation or retaining wall installation with confidence. Contact In-Depth Excavation today to get started on your project.